Windows or Linux - Which one the best? My Personal Experience

January 09, 2019
In this article I will discuss about windows vs linux operating system. And also share you why should we use linux.

I'm using linux about 2 years. Though linux has some limitations but its performance is just awesome. With its powerful security system. I didn't get virus attack in linux. Besides linux, I'm also using windows 7 too. I use windows firewall and microsoft security essential in windows 7. I was attacked by virus 2 times in windows 7. So, from my experience I want to share some advice for windows and linux users.
Windows or Linux - Which one the best? My Personal Experience

Windows or Linux? - Some Advice & Tips

For windows users:

Pirated windows is the main culprit. It has lowest security system that cause of attack various virus. So, if you need to use windows then use windows genuine version.

Microsoft's security essential just resisting virus when they attacked but it never took action before virus attack. Because of keep this application lightweight. Therefore, if you see the pc have virus but security essential doesn't took any action then don't afraid. But if you have any doubt then my advice is use Avast antivirus to take action against that virus.

Use firewall: From control panel enable the windows firewall. Firewall will confirm you that your applications couldn't get access to the internet without your permission.

Internet explorer give access to your windows many options. It is a big type of security threat and one of the best way of virus infection. So, update your internet explorer to the latest version or use another browser if possible.

Before use any software make sure that its trusted. Without well-knowing of a software don't use it. If you need to know about any software then just go to google.com/search and type the software name. It will give you a detailed information about that software.

For linux users:

Linux need security! After heard this you may thought that I'm just joking with you. But seriously linux is not except from virus attack. It also could be attacked by virus. Linux malwares are now server targeted because linux haven't much popular on desktop. But when linux is becoming more popular then the viruses will come to the desktop. So, from now linux users must be careful.

Linux most power security its online ripository. There softwares are tested and has no risk to use. So, use application from repository as far as possible.

Most of us use application from third party repo. We need first know well about that repo.

It's very easy to seek root permission of linux, just add 'sudo' or 'gksu' before command. So, think of the better before giving the root permission to a third party application or application which isn't installed from linux online repository. Internal security system of linux is very well so don't worry about it. Just carefully handle it. But security system has increased of windows too. Windows 7 is so much secure from windows xp. After all, well security requires users awareness.

Now the question is why you should use linux? Well, for better understanding why you should use linux, install a linux distro and do some development work with it. Then the same thing do with windows. Hope you will get the accurate proof and well understanding. Now lets read some linux faculty.

Linux facility

Linux Facility
Image from: WinCentral
1. Linux is mainly unix based system. In fact, linux is not unix but like as unix. You will have some opportunity/facility on software  development work if you use unix based system but in windows operating system there are lots of difficulty to get this facility. To read more about this just search it on Google.

2. World's most dangerous virus was wrote for windows, thats why virus attack on windows. Windows program doesn't work in linux, so that virus can't attack it. So, you can use linux without worry about virus or even antivirus.

3. Linux is very lightweight system. If you use a pentium four processor and 512 MB RAM or other old lower RAM, then it should be useable. So, in easy word linux is free, secured, free from virus that's are totally promotion or marketing. But if you wish you can use linux, break all the linux parts and research of each every parts. Almost you could learn about operating system.

Conclusion

After all most of us using that windows which is free. Because the paid version of windows needs money. So, when we using free windows, we like as a thief! Linux is totally free and open source. So, anyone can contribute with you in linux. Linux have same features wich windows have. Also linux has no virus. So, I always suggest you to work with linux to get better performance from windows.

One small request
Please share this post to your friends to take their decision on what operating system they should use. Your share will help your friends and a great support for us.
Windows or Linux - Which one the best? My Personal Experience Windows or Linux - Which one the best? My Personal Experience Reviewed by Basic Vai on January 09, 2019 Rating: 5

How To Format Your Memory or SD Card in Android Phone

January 08, 2019
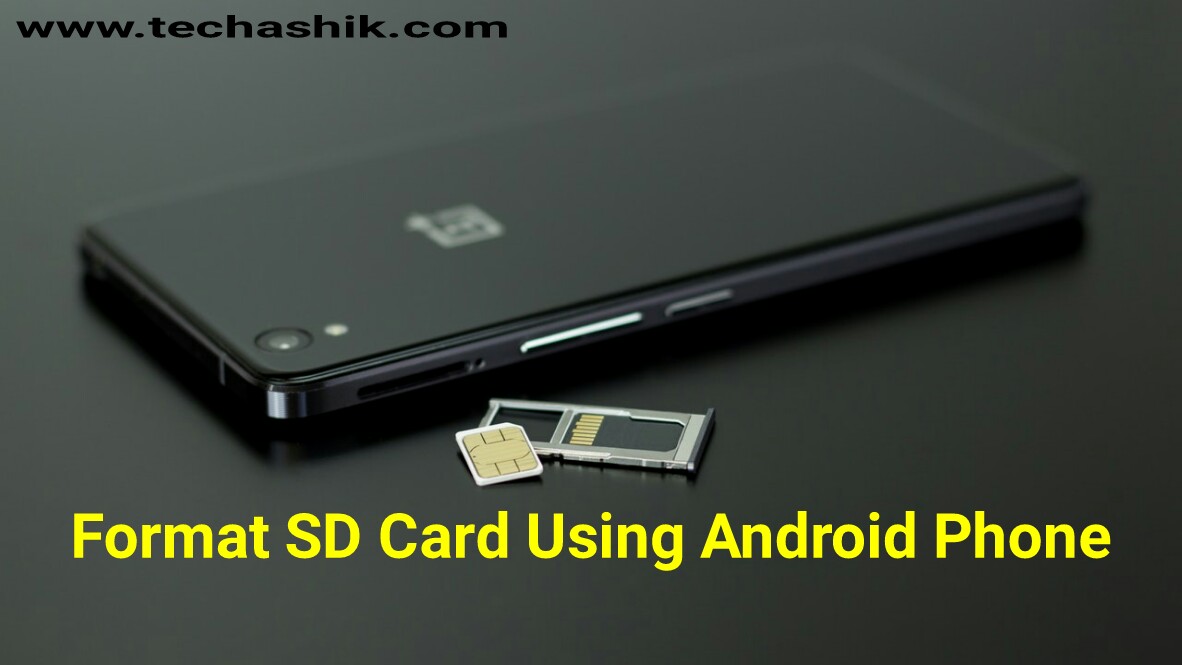
Did you tried to format your memory card in your android phone? But android phone haven't any default system for it! Here's I'm going to show you how to totally erase your memory card just using your android phone. This is the step by step method with screenshot that makes you learn it more easy.
How To Format Your Memory or SD Card in Android Phone
But before that you need to make sure that you back up your sd card data to another memory card or drive. If you no need to back up it then well let's see how to delete sd card through android phone easily.

Remember
"Before formating your sd card on your android phone make sure that your applications are not installed on your external memory card. If they're installed then first moves the installed location to your internal storage otherwise you will loss your application data."

How to Format SD Card in Android Phone

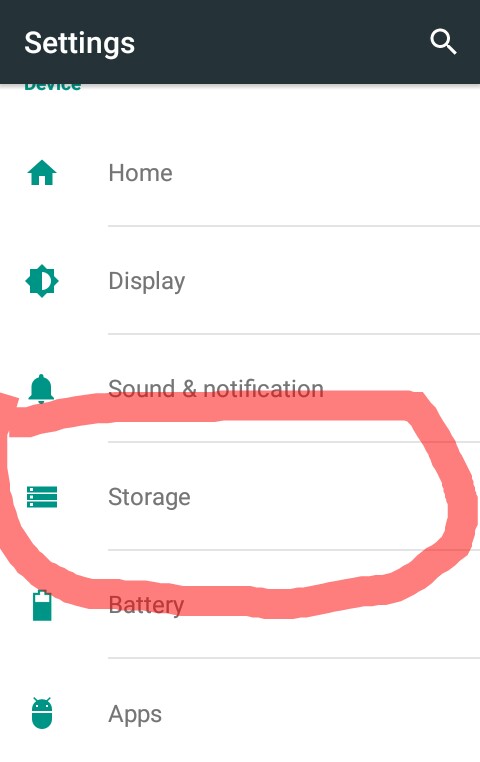
Go to your android phone settings option
Scroll down and you will see "Storage" option
Click on "Storage" option
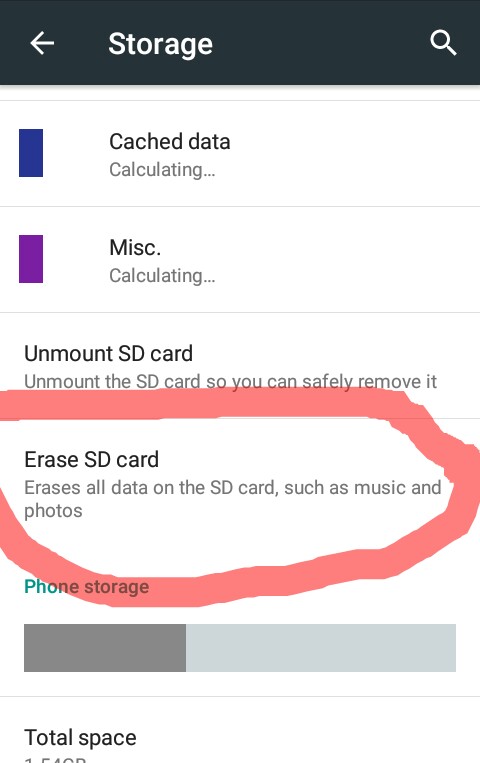
Scroll down and you will find "Erase SD Card" option
Just click on it
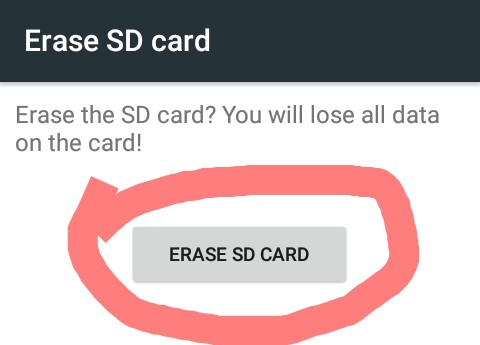
Then it will ask you to confirm it to "Erase SD Card"
Confirm it and it will take some seconds to totally erase it depend on your storage size
Done! :)

Here's a video tutorial will help you.

Please like this video & Subscribe to Android Brother BD

I think this post is helpful for you. Please share with your friends. If you have any question then feel free to ask in the comment section.
How To Format Your Memory or SD Card in Android Phone How To Format Your Memory or SD Card in Android Phone Reviewed by Basic Vai on January 08, 2019 Rating: 5

How to Remove/Delete Imo Friends of Friends Stories easily

October 22, 2018
How to Remove/Delete Imo Friends of Friends Stories easily
The Story Feature seems to be a new soecialism all among the social media and messaging apps even imo application is not exception. The imo story feature is much like Instagram story feature and it allows you to share every moment of your life with your friends.

You can take a photo, a video or type down a text and share it via imo story. Stories last only 24 hours and they will disappear after that.

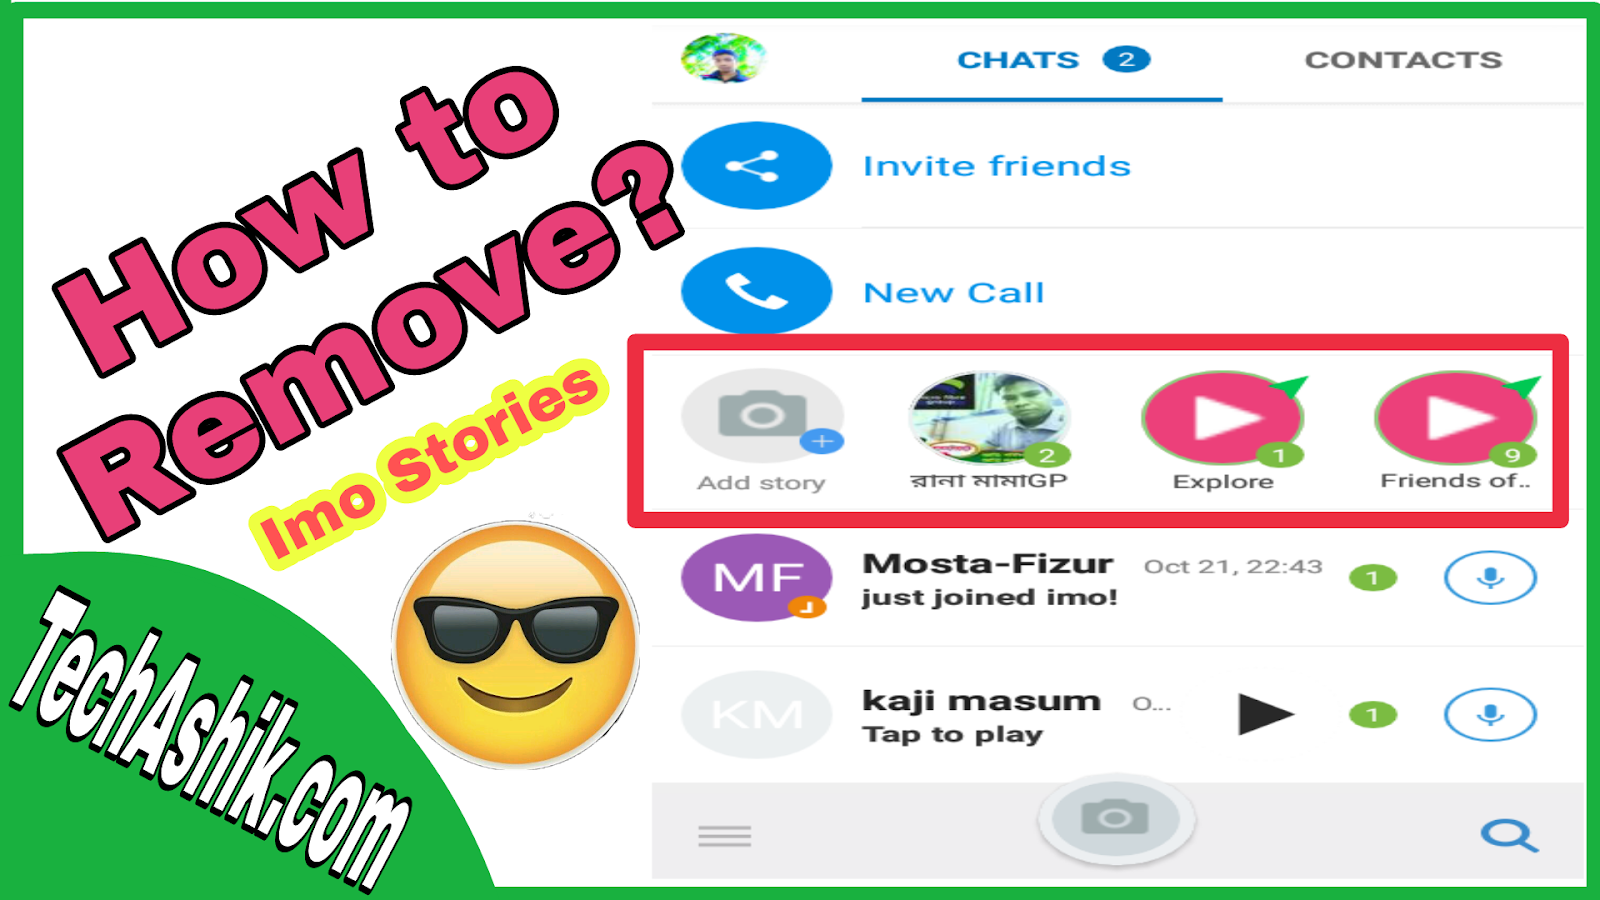
But one of the features that may create troubles for you is a feature called “Friend of friends” in which stories form contacts of your contacts will be displayed. You may not even know friends of your friends but their stories will show up in your imo story feed.

If you are also one of the people who is annoyed by this feature, I will show you how you can Remove/Disable imo story feature easily.

How to share stories on imo

Before I proceed to tell you how you can disable imo story feature, let’s take a look at how you can share stories on imo. This feature allows you to take a photo or capture a video and share it with your friends on imo for a 24-hour period.

In order to share a story on imo

  • Open imo application on your mobile phone and tap on the “Add Stroy” button right on the main page.
  • Now tap on the camera button to take a photo or you can tap on theg allery icon on the bottom left corner to choose a pre-existing photo.
  • Also, if you tap and hold on the camera icon, you can capture a video.
  • When you have taken your photo, you can add different filters, texts, or add your location.
  • When you are done editing your photo, you can share your story with your friends.


Remove imo story feature

If you have the latest version of imo, you are probably bothered by all those notifications from your friend’s and friend of friend’s notifications. If it is so, you can just disable imo story feature and get rid of all those notifications. Here is how you can do that.

In order to disable imo story from your
friends or friends of friends, you first need to

  • Run the application on your phone.
  • Then tap on the gear icon next to imo story line.
  • Then you will see an option for “Ignore story from these people” and then you will need to check the box next to Friends of friends.
  • Finally, tap on “Done” and you will no longer see stories from friends of friends.

If you think that imo story feature is not for
you and you want to disable the
notifications, you will need to take these
steps to disable imo story notifications.

  1. Tap on the three line icon on the bottom left corner of the screen to enter Settings
  2. In the Story notification section, untick Friends or Friends of friends, and you will no longer receive notifications from them

For your necessary a video given below, you can Delete/Hide  Imo Stories easily By taking above these two simple steps and watch below this video, you cane asily disable imo story notifications from friends or friends of friends and you will no longer be bothered by all those notification.
I hope you found this tutorial useful.
How to Remove/Delete Imo Friends of Friends Stories easily How to Remove/Delete Imo Friends of Friends Stories easily Reviewed by Basic Vai on October 22, 2018 Rating: 5

7 Methods to connect an Android Phone to a TV

September 27, 2018
7 Methods to connect an Android Phone to a TV
Your Android screen probably does not be so big Even if you are using a phone the size of a phablet, the screen will have approximately seven inches maximum. Meanwhile, the TV on your wall is 30 inches or more big ; perfect to connect your phone Android to your TV and enjoy a better experience.

Why connect your Android phone to your TV?

One reason is to play. On the screen big, the mobile games suddenly they turn into public pastimes instead of private, you can even stop using your game console .

The possibilities here are considerable. You can make it seem like such an experience good you do not want to play games Android without your television. Connect a controller to your phone to get the best results.

Meanwhile, your collection of photos and videos can also be a material perfect to share; Meanwhile he presentation software can take advantage an HDMI link to your screen. it's possible that you want to use an HDMI connection in your TV for productivity purposes.

7 Methods to connect your Android to your TV

1. Google Chromecast

Google chromcast
Probably the most obvious method is to through the popular Google Chromecast Ultra. This is essentially a tool for transmit media, or your screen phone, directly to a television. He Chromecast has an HDMI connector and a USB power cable (most of the televisions have a USB port that provides enough energy to feed the device). Once paired with your Android phone, it is ready to use.

All you need to do is use the Cast command in the drop-down menu Quick Android settings, or you find the icon in your applications favorites For example, the mobile application Chrome has a Cast option.

2. Amazon Fire TV Stick

Amazon fire tv stick
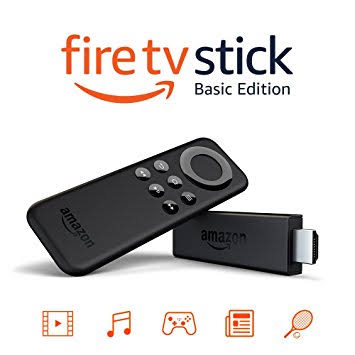
Another way to duplicate so Wireless your phone's screen Android is using an Amazon Fire Stick. The idea here is similar to the use of Chromecast; that is, it links the two devices and "project" the screen of start to a television. Then you could see content, applications, games and any transmission medium on your television.

The Amazon Fire TV Stick is one of the Amazon's best sellers; and one much more media center option flexible than the Google Chromecast Ultra.

3. Miracast Dongle

Miracast, a wireless HDMI system, it's built into many TVs modern Even if your TV does not have compatibility with Miracast, it's possible that your Blu-ray player or your center do it. Otherwise, you can connect a low cost Miracast dongle to the HDMI port of your TV.

To connect to a Miracast device with a phone that runs Android 6.0 Marshmallow or a newer version, open Settings> Device connection> Screen duplication and follow the steps which are detailed below. For older phones, you use Settings> Display> Cast screen, open the menu and check Enable screen Wireless.

4. From USB to HDMI

In recent years, compatibility has improved for USB to HDMI. For this, you need a converter to convert the USB connector signals (usually micro-USB, or maybe a USB connector type- C) to the HDMI cable and display the output on your TV or monitor chosen. You can buy a suitable USB to HDMI converter in Amazon.

The compatibility of the converters is different in all the smartphone. The Samsung phones and tablets work with them, just like some HTC phones and Motorola, but not others. Do not go out and buy a generic adapter. Instead, you search Google for the "HDMI USB Adapter for [Your Phone] "and see what appears. TO often, the first result will take you to a Amazon page for the piece of equipment what do you need.

There are two types available:

MHL: Means Mobile High-Definition Link and offers HD videos and surround sound from eight channels. It was funded in 2010 and currently offers the specification superMHL. The devices are available with micro-USB and USB type-C.

Slimport: It has low power requirements, which means that you can connect phone to your TV without draining the battery. Unless you play a game with big graphic requirements, of course! Fortunately, many Slimport cables They have a micro-USB port for connect your charging cable.

Keep in mind that there are other types of AV adapters available. If you do not have a HDMI TV, you can choose a cable Slimport compatible with VGA.

5. Connect your phone as a device storage

Another way to connect your Android phone to your television is like a device USB storage. While this is not good to share the screen, of all modes will allow you to see photos and videos in your TV.

Therefore, although you can not transmit videos of your favorite sports application to TV, you could still share your videos on vacation Just make sure that the USB port of your TV (or other device of media) be for public use; as some are limited for the use of engineer. The TV remote control You should also have some options multimedia control so you can find the files that you want to see in your phone.

6. Stream your network to your TV with DLNA

Various devices, from televisions and Blu-ray players up decoders and consoles, are compatible with Digital Living guidelines Network Alliance (DLNA). This means that with the correct application installed on your Android phone, you can transmit media directly to your television.

DLNA is widely used and is integrated in most devices; so you do not need any hardware additional for this. What you need, without However, it is an application like BubbleUPnP, or maybe AllConnect. As well you should consider Plex for Android.

7. HDMI connector on old phones

HDMI connector on old phones
A few years ago, several phones and Android tablets were sent with a physical port of HDMI output. These smartphones include the Sony Xperia S, the LG Optimus 2x, the LG Optimus 3D P920 (in the photo), Acer Iconia A1 and others.

If you have one of these phones more old, you need an HDMI cable special. These have a type A connector standard on one end and a connector adequate in the other. This could be Type D (micro-HDMI), Type-C (mini HDMI) or the Type-A standard.

The problem with these phones, without However, it is age. You could not enjoy of the latest versions of Android with older hardware and, by extension, the security and stability security updates.

However, if you can get one, You could install Kodi to make a center of compact media!

Go ahead, connect Android to your TV!

With the right hardware, you can enjoy of the high quality output of your phone or Android tablet on your HDTV. Either for play, look at pictures or enjoy music, the possibilities are intriguing.

You can, for example, run Plex or Kodi for Android on your phone or tablet. your portable media center ever staff (who could have had some LAN transmission possibilities) now is a complete media center, capable of show movies and TV shows in the TV of your family so that everyone can enjoy it.

With HDMI compatibility so affordable, it seems a loss to ignore this characteristic.
7 Methods to connect an Android Phone to a TV 7 Methods to connect an Android Phone to a TV Reviewed by Basic Vai on September 27, 2018 Rating: 5

How to use 2 WhatsApp accounts in a Dual SIM phone

September 25, 2018
How to use 2 WhatsApp accounts in a Dual SIM phone
If you have a dual SIM phone, you can use the different SIM cards to make calls using separate numbers; and send text messages using different numbers. But did you know that you can set up two WhatsApp accounts and use them on the same phone? If you ever wondered how to install two WhatsApp accounts on a phone, then you've come to the right place.

There are some different ways of doing it; and some phone manufacturers offer this as a built-in feature. In other cases, you will have to resort to third-party applications; but it's actually quite easy to run two WhatsApp accounts on an Android phone. Sorry, iPhone users, with you do not apply the steps to explain.

Obviously, this method of running two WhatsApp accounts on a phone requires a dual SIM phone: WhatsApp uses the phone number as its identity and detects it through a text message or call; so it has to be a phone with two SIM cards. However, if you have a dual SIM phone, then the next step should be to verify your configuration, because it is quite possible that the manufacturer has already created dual WhatsApp configurations.

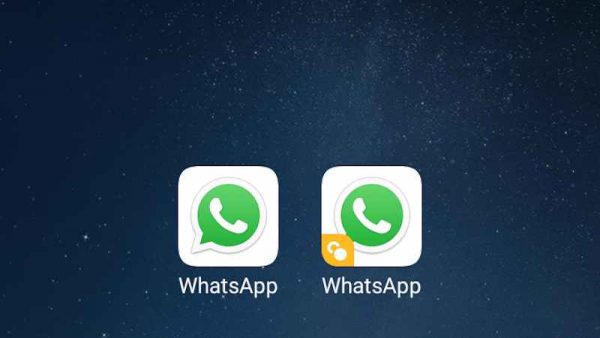
Many Chinese manufacturers allow you to create application clones, which can then be used with a dual SIM configuration. For example, in the EMUI mask of Honor, the function is called App Twin. On Xiaomi phones, it's called Dual Apps. Vivo calls it Clone App; while Oppo calls it Clone application.

The way in which each of these companies has configured it varies a little; so you will want to consult specific information for your phone. But first we have listed the steps for some of the popular brands. In case your phone does not support this function, there is one more solution you can try, listed at the end.

But the most important thing is that if you have one of these phones, then the steps you must follow are incredibly simple; and they are also very similar in the three manufacturers; so we have brought them together in one place. In all three cases, you'll start installing WhatsApp on your phone through Google Play. After that, you can clone the application in the phone configuration.
Dual apps: Whatsapp

Step by Step

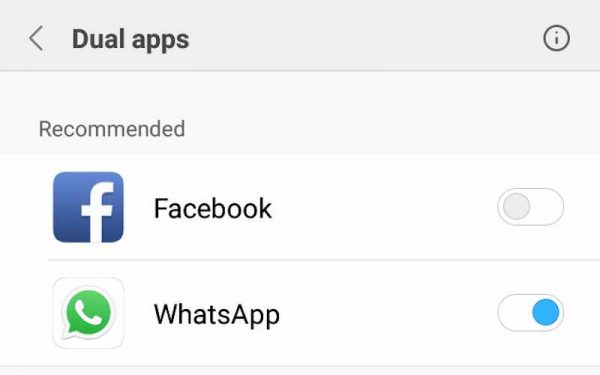
These are the detailed steps to run two WhatsApp accounts on your Xiaomi phone, but it is very similar for the other two as well:

  1. After you have installed WhatsApp, go to Settings.
  2. Touch Dual applications. In Honor phones this is called App Twin, and in the Oppo it's Clone application.
  3. You will see a list of applications that can work with the function and alternate between them. Activate the option to clone any application.

That's it, you're finished. Check if your manufacturer supports the cloning of applications as well; and if so, then these steps should work to get a second copy of WhatsApp on your phone. It's a bit different on a Live phone, so we'll explain it first; and then we'll talk about how to set up the second WhatsApp.

How to run two WhatsApp accounts on a Vivo phone

The steps for Vivo are very similar to other brands, but slightly different. To clone WhatsApp on a Vivo phone (we tested this on a Vivo V5s), simply follow these steps:

  1. Go to Settings.
  2. Scroll down to find Application Clone and touch it.
  3. Now, toggle the switch to enable Show the Clone button.
  4. Then, install WhatsApp on your phone through Google Play.
  5. Press and hold on any icon of the application. You will see a small "x" to remove applications; but some, like WhatsApp, will also have a small "+" symbol.
  6. Touch "+" to clone WhatsApp on your phone.

Okay, then at this point, you should have two copies of WhatsApp on your phone. This is what you have to do next.
Setting up Whatsapp dual

Setting up WhatsApp Dual

Setting up your second WhatsApp account is extremely simple; just like setting the first one. In case you have doubts, these are the detailed steps:

  1. Start the second WhatsApp.
  2. On the next page, touch Accept and Continue.
  3. Next, you can grant access to files and contacts to this copy of WhatsApp. To do this, click Continue and follow the instructions on the screen; or touching No now for now.
  4. Now, you must verify your phone number. This is the crucial part: remember that you have to be the second phone number of the SIM card. If you enter your main number, you are simply changing WhatsApp access from one application to the next.
  5. Once you have entered your number, touch Next; then confirm the number by touching OK.
  6. WhatsApp will then send a verification code to verify the number, which will be read automatically if you have granted permissions. Otherwise, simply write the verification number and you'll be ready. In case you do not receive the SMS, you can also press the Call button on the screen to get a verification phone call.

That's it, now you have two versions of WhatsApp running on your phone. You can send and receive messages using both numbers; so it is useful if you want to separate your personal use from your professional use, for example.

You can also use the steps indicated above to install multiple copies of other applications. Obviously, if you want two Twitter applications or two of Facebook on your phone, for personal use and a commercial account, for example, that is easy to do by following the same steps, except that you clone those applications instead of WhatsApp.

What if your phone does not support application cloning?

If your phone does not support the cloning of applications, there are still a couple of ways to continue and install a second copy of WhatsApp. You will still need a dual SIM phone to send and receive messages from two accounts. There are some popular methods that you will find online; and the one we thought was better is an application called Parallel Space.

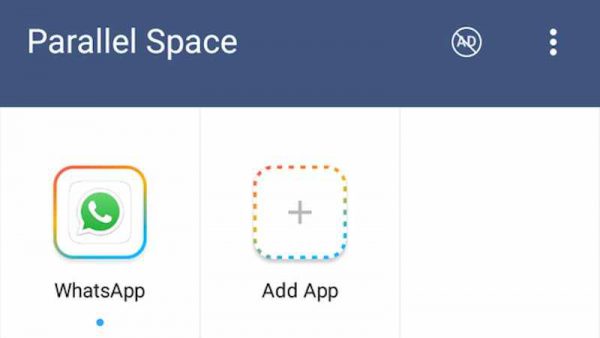
As its name suggests, this application creates a parallel "space" where you can install applications; which allows you to clone different applications. These are the steps to use this application:
Parallel space app

  1. First you must install Parallel Space from Google Play. Once you start the application, it will immediately take you to a Clone Applications page.
  2. Select all the applications that you wish to clone and touch the Add to parallel space button.
  3. Then, they will take you to Parallel Space, where the application runs in a virtual installation on your phone.
  4. Now, continue configuring WhatsApp as described above.

That's it, you can use WhatsApp and other applications by accessing them through the Parallel Space application. The application is free but with advertising. Again, this can also be used for applications like Facebook.

Another method you will find in many sites is to install an application called GBWhatsApp, but this involves installing the application through APK, which has a small element of risk involved. In addition to that, it is only useful for a single scenario, which runs dual WhatsApp; so we believe that using Parallel Space is a better option.

That's all about it. Now you can start using two WhatsApp accounts at the same time.
How to use 2 WhatsApp accounts in a Dual SIM phone How to use 2 WhatsApp accounts in a Dual SIM phone Reviewed by Basic Vai on September 25, 2018 Rating: 5

How to create Instagram Account on Android Phone easily

September 18, 2018
Instagram is a simple way to capture and share the world’s moments. Follow your friends and family to see what they’re up to, and discover accounts from all over the world that are sharing things you love. Join the community of over 1 billion people and express yourself by sharing all the moments of your day - the highlights and everything in between, too.
How to create Instagram Account on Android Phone easily
In this article I'll show you how you can create an Instagram Account with your Android phone easily. This article only for who don't know how to make Instagram account. But before going to this article make sure you have subscribe in our newsletter to get amazing article notification in your email.

Steps to Create an Instagram Account on Android

  • Install Instagram Apps from Google Play Store & open it.
  • Enter your email address & tap Next.
  • Enter your Full name & Password then tap Next.
  • Choose your user name & tap Next.
  • Connect your Facebook account to Your Instagram account or Just simply skip this.
  • Upload a profile photo to your Instagram account.
  • Enjoy your newly created Instagram account.

See this video to get clear idea about How to create Instagram Account on Android Phone easily

Use Instagram to:

  • Post photos and videos you want to keep on your profile grid. Edit them with filters and creative tools and combine multiple clips into one video.
  • Browse photos and videos from people you follow in your feed. Interact with posts you care about with likes and comments.
  • Share multiple photos and videos (as many as you want!) to your story. Bring them to life with text, drawing tools and other creative effects. . They disappear after 24 hours and won’t appear on your profile grid or in feed.
  • Go live to connect with your friends in the moment. Try going live with a friend and sharing a replay to your story when you’re done.
  • Message your friends privately in Direct. Send them photos and videos that disappear and share content you see on Instagram.
  • Watch stories and live videos from the people you follow in a bar at the top of your feed.
  • Discover photos, videos and stories you might like and follow new accounts on the Explore tab.

Share this article to your friends.
How to create Instagram Account on Android Phone easily How to create Instagram Account on Android Phone easily Reviewed by Basic Vai on September 18, 2018 Rating: 5

How to use the PS4 controller on your Android Phone

September 08, 2018
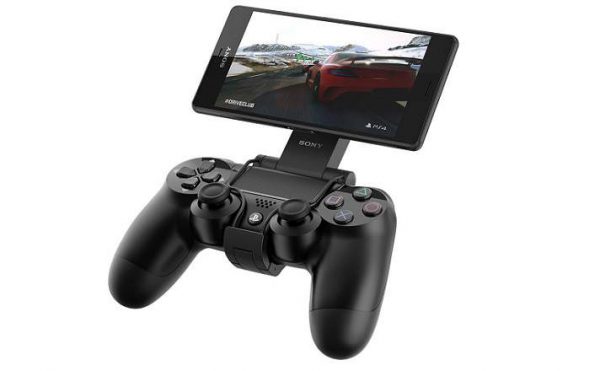
If you have a video game console, you probably already have a usable Bluetooth joystick for your Android phone. This is because most state-of-the-art console controllers use Bluetooth as a standard; or include it for use on other platforms. Which means yes, it's possible to use a PS4 joystick on your Android, be it a phone, tablet or Android TV device. We are here to show you how.
How to use the PS4 controller on your Android Phone

What you will need

First you want a DualShock 4 joystick. Unlike the Xbox One joystick, all DualShock 4 joysticks have built-in Bluetooth; No matter when and where you got it, because the PlayStation 4 uses Bluetooth as its standard wireless connection protocol.

If you already have a PS4, congratulations, you have everything you need. And if you do not have a PS4 joystick, you can always buy one at Amazon.
How to use the PS4 controller on your Android Phone

How to use a PS4 on your Android

With the controller and the phone in hand, the pairing process is simple. We will guide you step by step:

1. On your Android device, make sure your Bluetooth radio is activated by opening the settings and going to the Bluetooth menu. Make sure the phone is in scan mode.

2. With the controller, simultaneously press and hold the PlayStation button and the Share button for a few seconds. The controller light will begin to flash to indicate that it is in torque mode.

3. Back on the phone, look for a device called Wireless Controller in the list of nearby Bluetooth devices. Touch that device to begin the pairing process.

4. The controller light should stop blinking and you should get confirmation on your phone that the connection was successful.

If all goes well, you will be connected and the driver can be used to navigate the Android UI.

Potential problems

In the tests, I discovered that it does not behave as well as a dedicated mobile joystick or even the controller of the Xbox One. For example, although I could move my character and rotate the camera using the analog sticks in Modern Combat 5, the aim buttons and shoot were relegated to the Share and Option buttons, respectively. This resulted in a rather uncomfortable and uncomfortable control scheme with which I certainly could not play the game in the long run.

Your mileage may vary in this respect. Test your favorite controller games and see if they have any problems. Ideally, a game would simply let you remap all the buttons like an emulator would; but that is not the case with most games.

One possible route you can take is to root your device to customize the HID profile and make the design of your joystick more standardized for the games it plays; although we would not recommend this option for the inexperienced. In fact, you should try to stay away from rooting your device in general, since you can open the nasty security problems and strange behavior of the device that would not be worth it.
How to use the PS4 controller on your Android Phone How to use the PS4 controller on your Android Phone Reviewed by Basic Vai on September 08, 2018 Rating: 5
Powered by Blogger.